Interface

Input panel
The input panel sits on the left-hand side on desktop and at the top on mobile. This is where you add the detail and control the settings of your audio generation.
Two core inputs in this panel are the Text prompt and Input audio.
1User guide
You can easily access the user guide from the ‘i’ icon at the top right of the input panel.
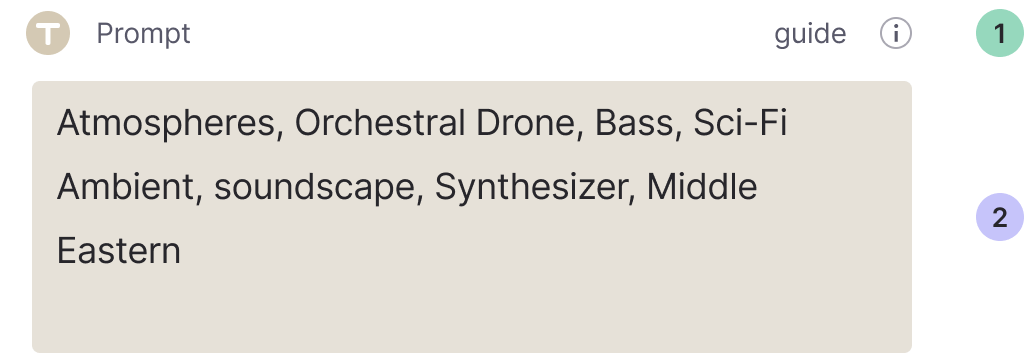
2Text prompt
Describe what you want your audio output to sound like within this text field.

3Select model
There’s a range of models to select from. The newest model is auto-selected.
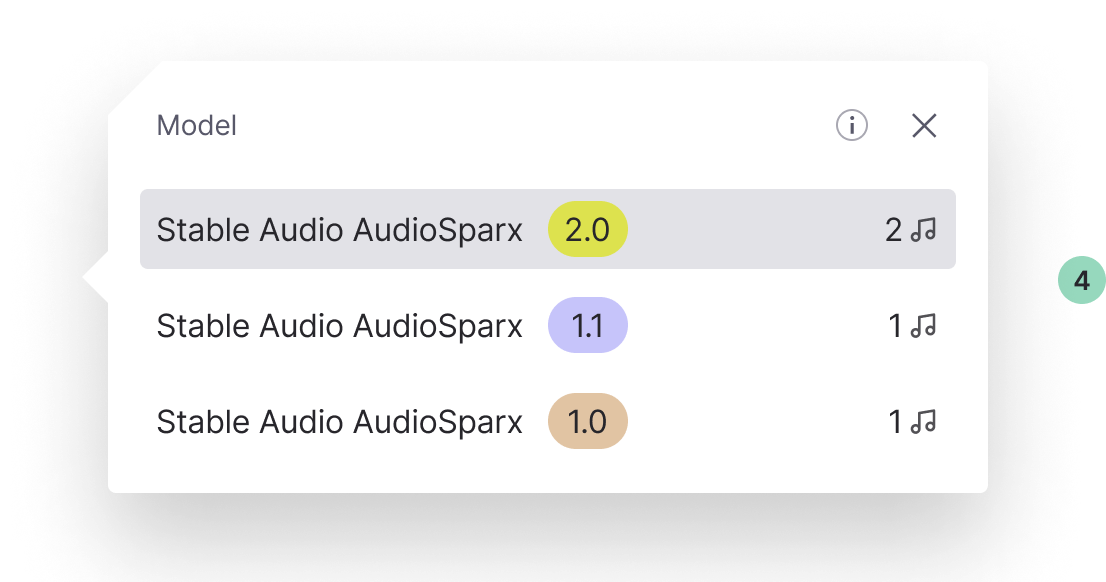
4Model selection window
Within the model selection window you can:
- Select the model you want to use.
- See the amount of track credits it costs to generate.
- Find out more about our models by selecting the ‘i’ icon.

5Prompt library
Access a library of prompts to get a feel for what can be generated and tips on prompts that produce really good audio output.

6Input audio
Check the remaining audio upload quota for the current monthly payment cycle. For example ‘29m 20s remaining’.
View the audio-to-audio and upload audio guide by selecting the ‘i’ icon.
7Add audio
By selecting the ‘Add audio’ button this opens the audio modal where you can upload or record audio to help guide your audio generation.
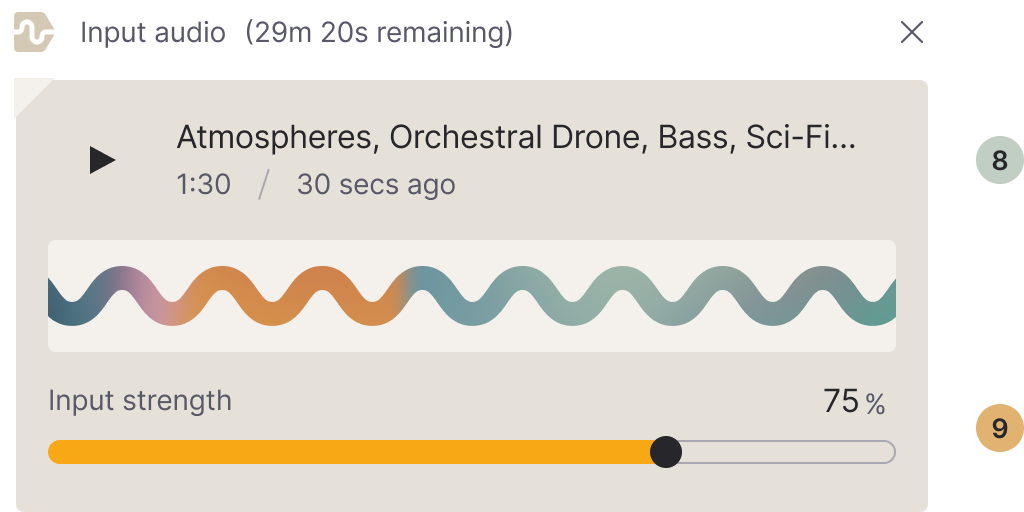
8Input audio
Select one of your generated tracks or upload your own audio to be used as input audio. This will populate the input audio area with your selected track.
9Input strength
This slider controls how much of your selected audio is imposed on the final result.
A higher percentage means that less diffusion will be done on your audio, whereas a lower percentage allows for more diffusion and thus more variation.

10Add extras
There are more settings you can add to control your audio generation within the ‘Add extras’ menu.
11Generate button
Tap this button to generate your audio.
The number displayed on the right of the button is the amount of track credits it costs to generate with the selected model. For example, the Stable Audio 2.0 model costs 2 track credits per generated track.
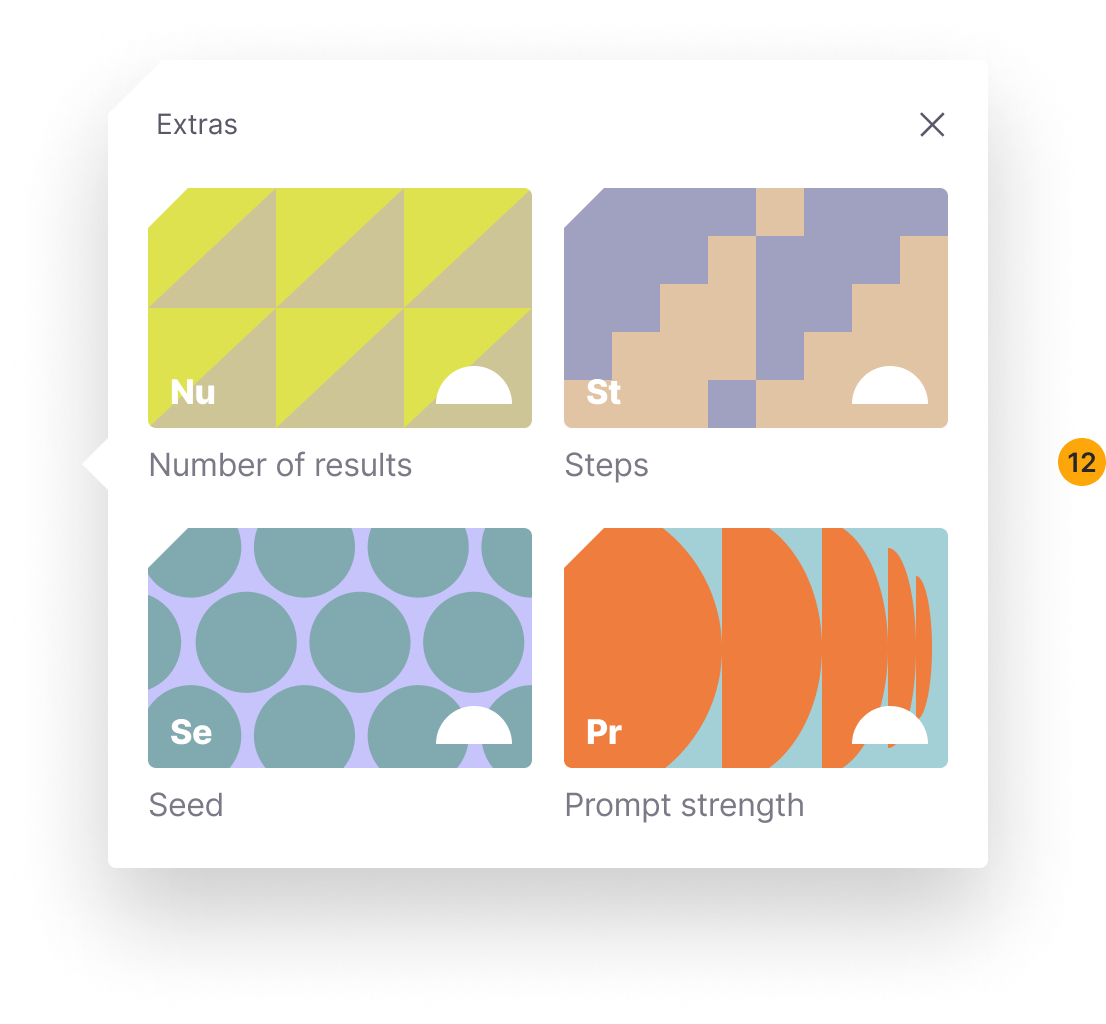
12Add extras
Add more settings to control your audio generation from the extras window.
- Number of results
- Steps
- Seed
- Prompt strength

13Steps
Informs the amount of generation steps used to create your audio track. Higher step count = greater processing. This can increase the quality of your audio slightly. We have found 50 to be the sweet spot.

14Number of results
This controls the number of generated tracks returned while generating. Only accessible on the pro plan—with a maximum number of 5 generations at a time.
Note: by inputing 4 here this will cost you 4 tracks when generating.

15Seed
By default, Seed is set to ‘random’. By adding your own seed value (e.g. 17924) this informs the specific arrangement of noise used to generate your audio.
Note: when generating multiple results remember to have the seed set to ‘random’.

16Prompt strength
Controls how closely the model attempts to guide the audio to your text prompt.
Preview panel
Listen to your AI generated audio and use the quick actions to copy the prompt, share, download and much more.
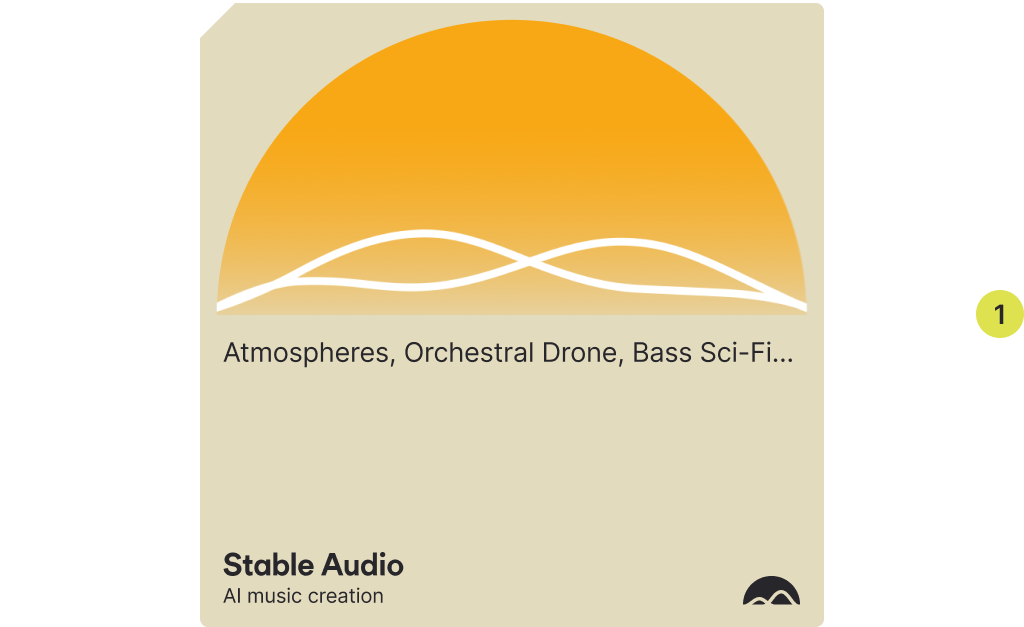
1Audio player
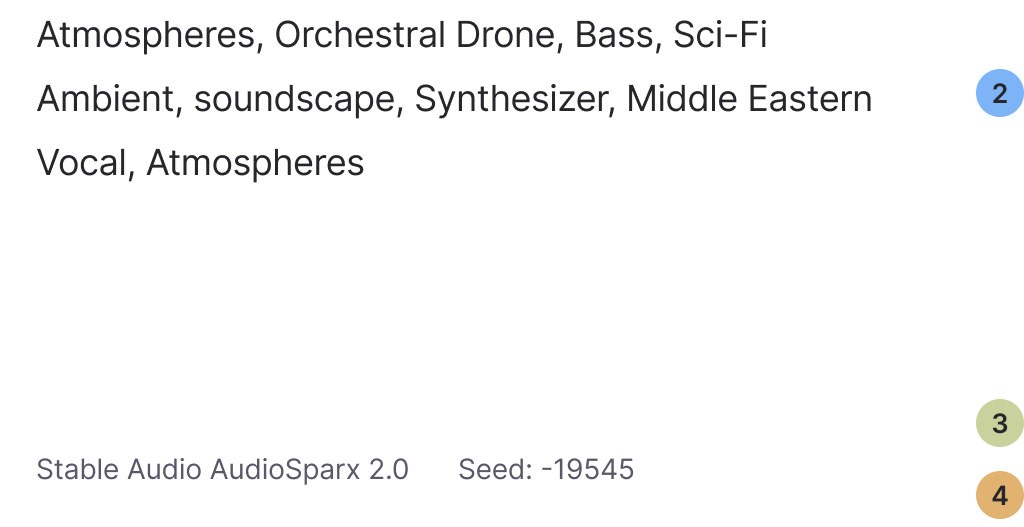
2Prompt
3Model used
4Seed

5Use prompt again
Load the prompt you’re previewing into the prompt field in the input panel.
6Copy prompt
Does what it says on this tin.
7Use as input audio
Add the audio you’re previewing as input audio in your next generation.

8Share
9Download
10Thumbs up
This is to rate the generated track positively, helping us to improve our AI model.
11Thumbs down
Rate the generated track negatively, helping us to improve our AI model.
History panel
View your generated and uploaded audio history.
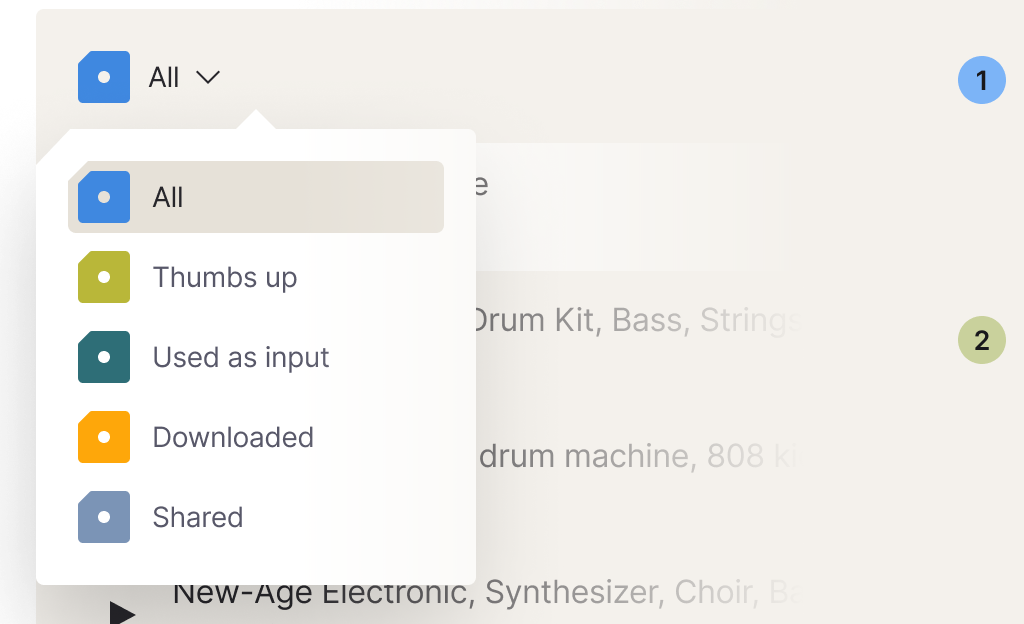
1Filter drop down
2Filter selection window

3History & upload view
Tab controls to view your generated audio history and uploaded audio.

4Add audio
In the top right corner of the history panel, there's a convenient option to add audio to your upload view.

5Use as input audio
In the upload view you can select the audio to be used as input audio.